פוסט זה זמין גם ב:
![]() עברית
עברית
Written by John Korducki
Spoon![]() Feed
Feed
This article is a literature review that covers seven elbow reduction techniques and the key tenets of management. See the visuals for each — a picture is worth a thousand words.
Why does this matter?
Elbow dislocations are a common ED presentation well within the emergency physician’s wheelhouse. What’s the best way to reduce them? By the way, this is a feature post that’s longer than usual, but you’re going to LOVE IT!
Throwin’ bows back in
A vast majority (98.5%) of elbow dislocations are posterior, with fractures occurring in >50% of cases—usually to the coronoid or radial head. In 16-22% of cases, nerve injury (usually median or ulnar) occurs, with most improving post-reduction. Rarely, brachial artery rupture may occur.
General management: As with any reduction, analgesia and patient comfort are paramount to success. The author recommends intraarticular injection of local anesthetic or a brachial plexus nerve block, if that is within your skillset. Procedural sedation is also commonly used and may be required for patients with uncontrolled pain. Reduction techniques are described below, but also look at the visuals for each—a picture is worth a thousand words here.
Traction-Countertraction
There are 1 and 2 person techniques for this method. For each of these, supinate the forearm and flex the elbow to 90 degrees.
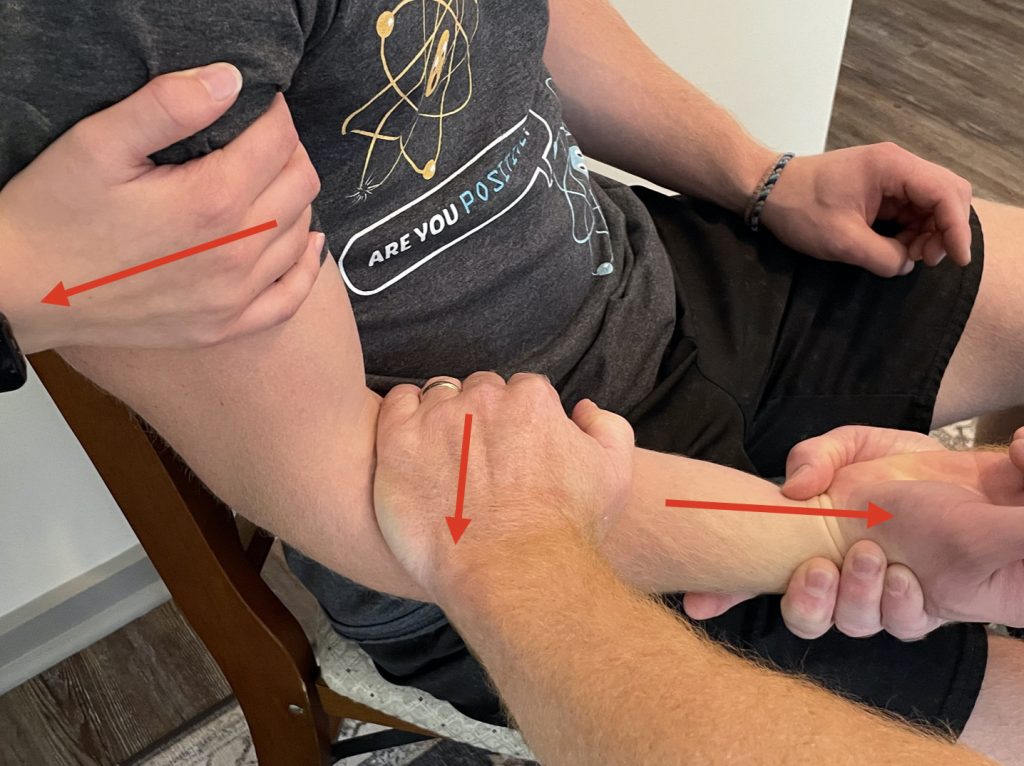
2 Person Technique:
Assistant grabs the mid-distal humerus (NOT the antecubital fossa) and applies counter traction to the provider applying longitudinal traction in a slow, controlled fashion to reduce risk of muscle spasm. The clinician may also guide the olecranon process with direct pressure. See Figure 1.
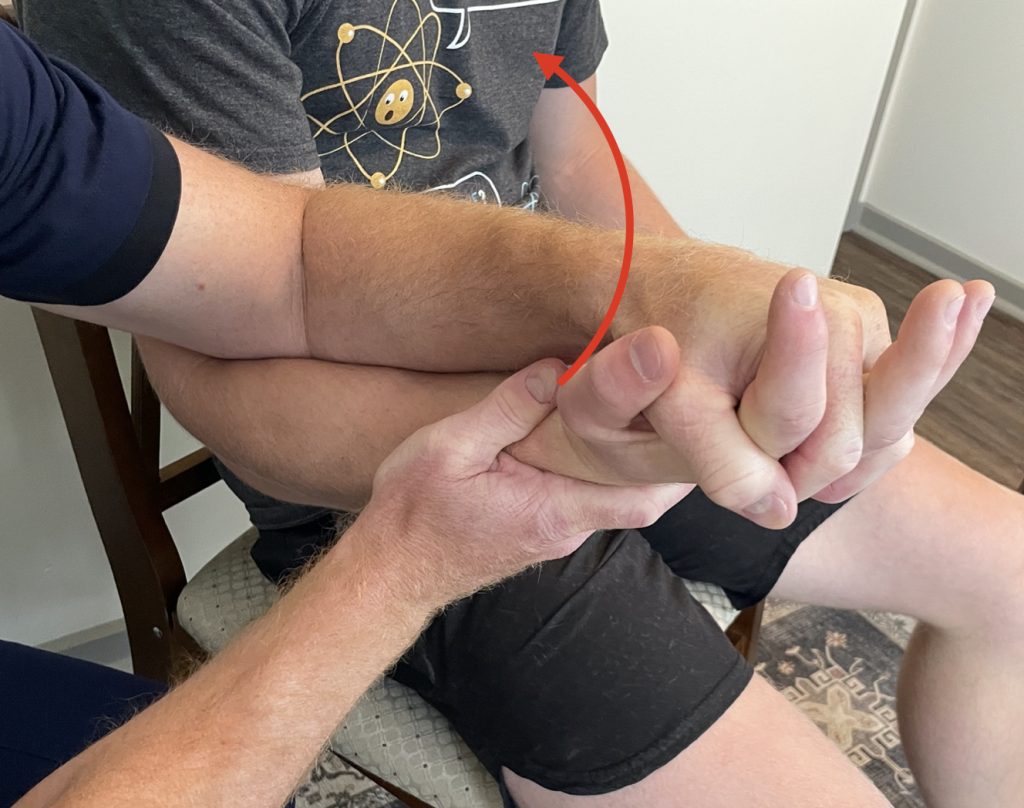
1 Person Technique:
The single clinician applies counter-traction at the mid-distal humerus with one hand while grabbing the patient’s wrist or hand distally and applying slow, steady longitudinal traction. See Figure 2.
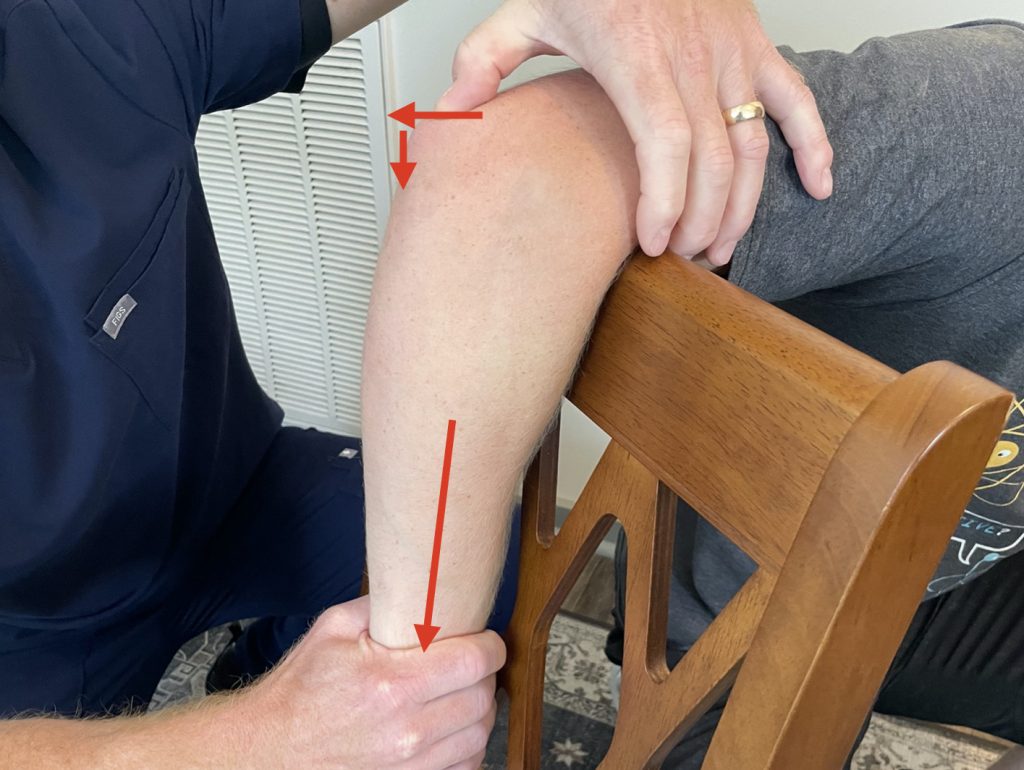
A modified version of this utilizes the single clinician’s leg to provide countertraction by having the clinician stand behind the bed, placing their foot up on the bed with a flexed knee (Captain Morgan style), pulling the patient’s proximal arm into the clinician’s popliteal fossa and applying longitudinal force to the forearm. See Figure 3.
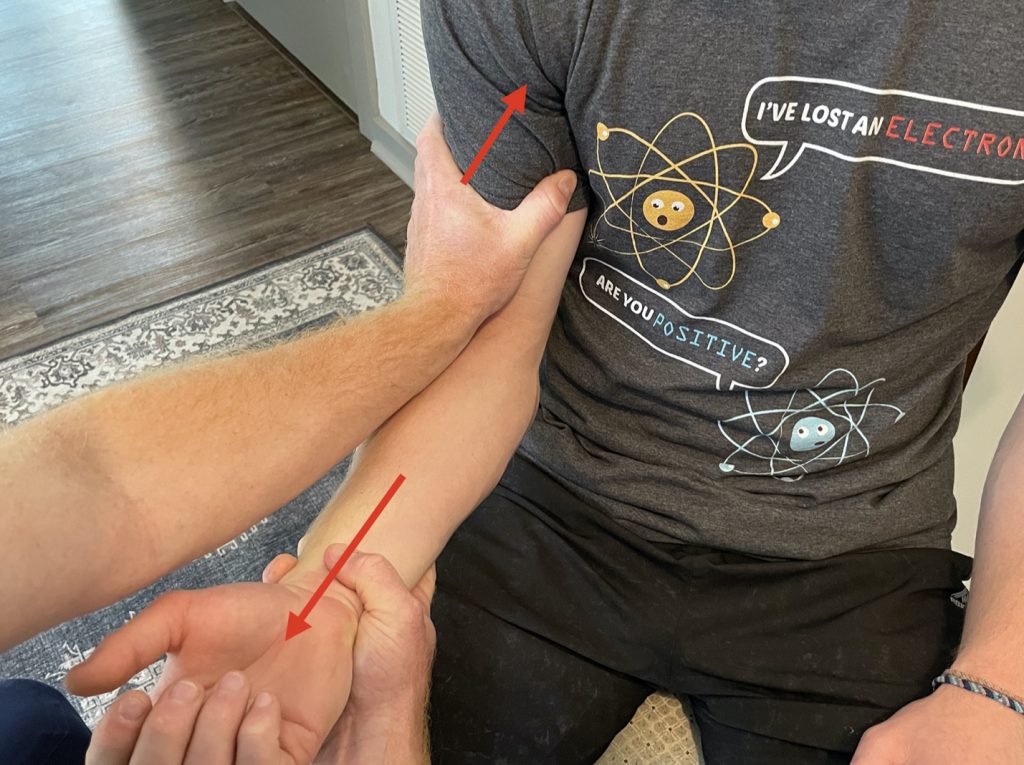
Another modified version has the patient pull their arm across their chest and utilizes their chest as counter-traction. The benefit to these modified techniques is that it frees up both hands for the provider to work with. See Figure 4.
Leverage Technique
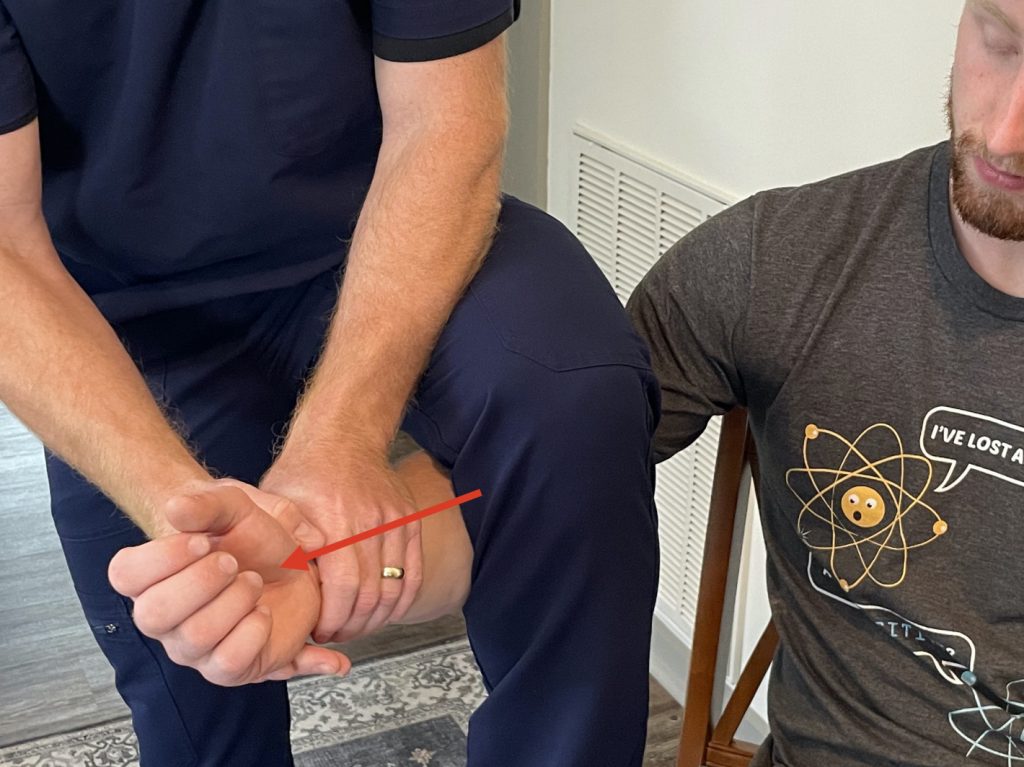
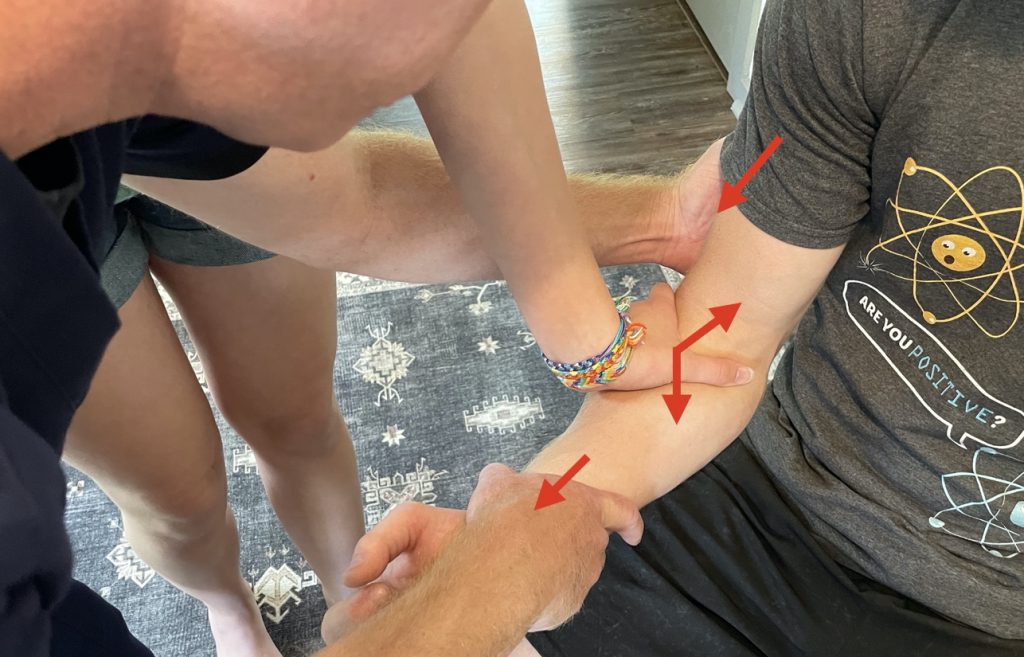
With the patient again supinated and flexed 90 degrees at the elbow, the clinician stands behind the patient and interlocks their fingers with the patients (or grabs at the wrist if the patient has a longer forearm) with the clinician placing their elbow against the distal portion of the patient’s biceps. The clinician then slowly hyperflexes the patient at the elbow using their own elbow as a fulcrum. See Figure 5.
Hanging-Arm Technique
Similar to the Stimson technique for shoulder reduction, the patient is placed prone with their elbow flexed to 90 degrees hanging over the edge of the bed. The clinician then applies both axial traction and direct pressure at the olecranon to guide the elbow back into place. This technique typically requires more time—1 to 10 minutes of traction. See Figure 6.
Anterior Dislocation
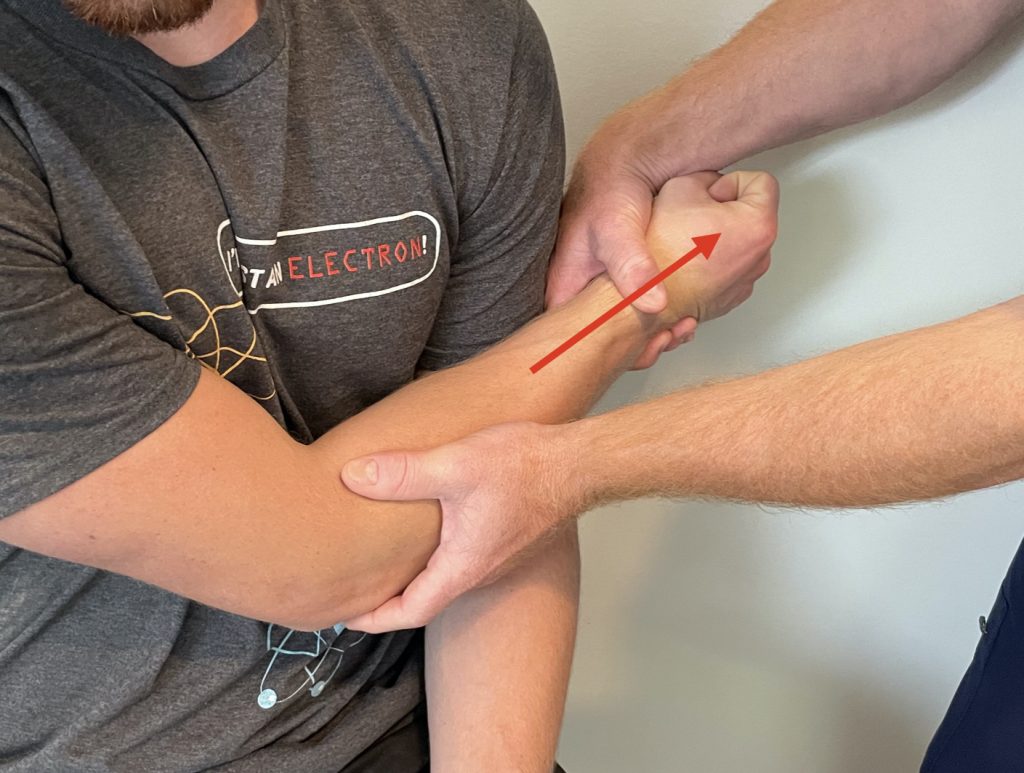
Typically requires multiple providers. One will provide inline traction to disengage the olecranon from the anterior humerus. Once this is achieved, another provider should apply posterior traction to the proximal forearm to guide the olecranon past the distal humerus. See Figure 7.
Post-Reduction: The author recommends checking joint stability by performing varus and valgus stress testing with the elbow at 20 degrees of flexion and the humerus externally rotated. This is important because it determines how you should splint the patient. Laxity with valgus stress indicates a medial collateral ligament injury and should be splinted in supination. Laxity with varus stress indicates a lateral collateral ligament injury and should be splinted in pronation. Splinting should occur with the elbow flexed to ~90 degrees in a long arm posterior splint.
Remember to ALWAYS perform and document pre- and post-reduction neurovascular exams. These injuries are able to be referred to an orthopedic clinic within 1 week. Emergent orthopedic consultation for operative repair should occur when there is persistent instability (keeps dislocating) requiring immobilization >45 degrees flexion to maintain reduction, persistent nerve or vascular injury, failed reduction, or signs of compartment syndrome. I also advise advocating for your patient and talking to orthopedics anytime there is a concern about a patient’s socioeconomic or insurance status limiting their ability to follow up.
Another Spoonful
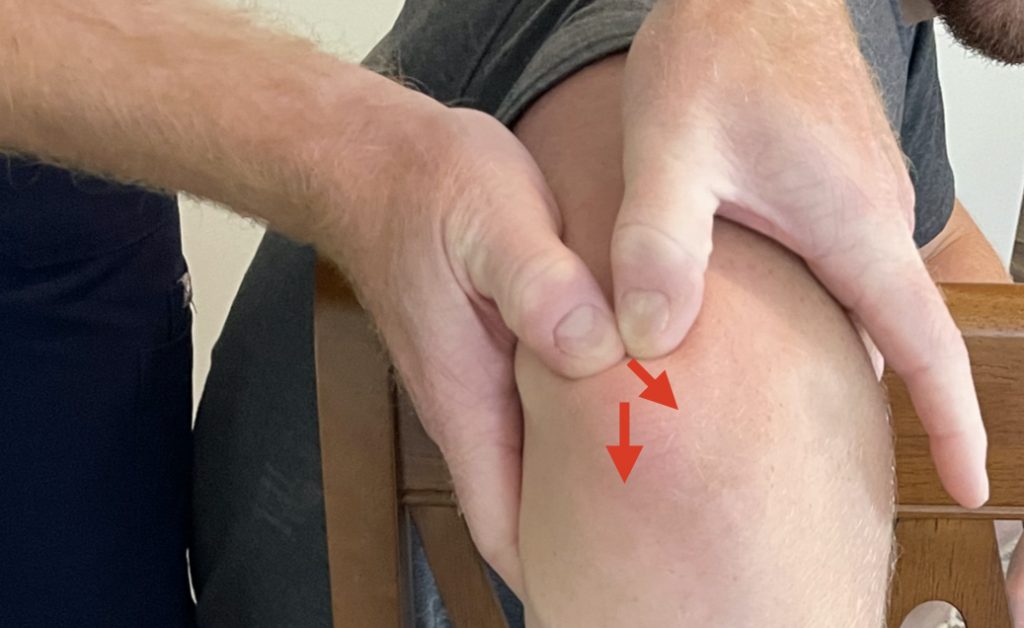
Editor’s Note: I use the variation of the hanging arm technique, with no traction (mentioned and cited in this paper). Let’s call it the “Double Thumbs Technique.” Sedate the patient. Ketamine is fine, because this is mainly a leverage issue, not muscle spasm. Elevate head of the bed 30-45 degrees. Hang the affected arm over the ipsilateral, padded, raised bed rail (I don’t flip them prone). Put both thumbs on the protruding olecranon, fingers grasping the distal humerus, and very firmly push it up and over to disengage the coronoid process (See Figure 8). Works like a charm!
I strongly recommend reading this article in full in the Annals of Emergency Medicine. The images are really professional. However, to respect copyright, we took our own pictures! Special thanks to my kids for helping me demonstrate and photograph the reduction techniques. ~Clay Smith
Source
Managing Elbow Dislocations. Ann Emerg Med. 2022 Jun 16;S0196-0644(22)00278-5. doi: 10.1016/j.annemergmed.2022.04.029. Online ahead of print.